With school approaching I finally decided to give it a try because, well.. bleach is practically FREE and I thought it would be a really fun way to spruce up some plain shirts.
I went for the spray bottle/stencil technique and used contact paper for my stencil because again, practically FREE. There are literally hoards of the stuff in thrift shops. I happen to have some on hand, and I know they have some at the Dollar Tree.
I made a stencil on the computer, piecing together some wings from one site and a guitar from another. It's not perfect, but I knew I could smooth out the lines with the Xacto knife.

You could just find any image online and print it out. I do have a tip now, having done this, that thin lines can get a little tricky, so going bolder will probably be your better bet.
I used a spritz bottle and read that the pump (up and down) spritzers work better than the trigger spray bottles, so I emptied out one that I had (dollar tree perfume gag) and filled it with bleach. I added a little water because my bleach was the thicker splash-proof, but most say to use straight bleach. Your call.
I stuck the stencil in place and sprayed parallel to the shirt, a good distance above, letting the bleach fall onto the fabric. The reaction was fast and I could see it happening right away. I brought it in, rinsed it off in the sink and then washed it. Here it is, still damp before I put it in the drier. (I was impatient to take pics lol)

Not too bad! The shirt is stretched out a bit (old shirt) but I think I put a little life into something boring. I like the simplicity, but part of me wants to add more next time, maybe embellish with some text or with a bleach pen. I think it would have made a bigger impact had I done it in the center, but the pocket made me stick it over in the opposite corner, and I think it looks more trendy there, but I'd love to see it pop more, or go over to the pocket.
The large lighter spots were a result of bigger droplets forming on top of the contact paper and then spilling over when I lifted it. Next time I'll pat it off with a paper towel and I think that will solve the issue. You can see the thinner lines of the guitar almost disappeared, and that is why I suggest going with a bolder/thicker image.
It actually photographed really bright. The overall effect is much more subtle, and even more so now that it's been dried. I will definitely be doing this again. It was really easy and I think tweaking the process will make it that much better.
If you get your T-shirt at Michaels or Hobby Lobby and use an online coupon, this could be a super cheap project.

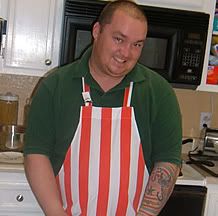
He loves the shirt but was forced into this photo. I now have to give my undivided attention while he explains the cat trap he just built outside. I'm being rushed this very minute!







I love that idea!!! Isabel has plenty of plain shirts I can mess with... lol
ReplyDeleteThis is a great idea that I'll be trying too!
ReplyDeleteI can't believe how grown up the Scientist is now!
A cat trap???? He needs to start a blog of his own!
Seriously easy guys!
ReplyDelete